I’m totally into making homemade bread as a usual thing. Purchased bread is faster and easier and I am all about faster and easier! You can use bought bread dough to make many delicious recipes, like pull-apart bread. But there is something special about making homemade bread, on occasion. Taking a loaf of warm bread out of the oven is deeply satisfying and worth the steps of waiting for the dough to rise.
If you have never tried making homemade bread…you should! I’m not saying become a homemade bread expert. Nor do I think you have to make your own bread for health or budget reasons. Nope.
Just for soul reasons.
Feed the soul kind of stuff.
If you have a stand mixer and dough hook it will make your bread-making much easier because you can let the mixer do all the work of kneading.
I have a stand mixer and hook but will often still do my own kneading. It can be deeply satisfying to knead it myself. And gosh it helps take out aggression ;). Not that I have any. <— insert cheeky grin
The other thing that is oddly satisfying is watching dough rise. I don’t sit and watch over minute by minute. No. But it is so cool to see it go in the pan small and 30 minutes later be doubled in size. I must be such a geek to like that stuff.
Bread rising never gets old. Love it!
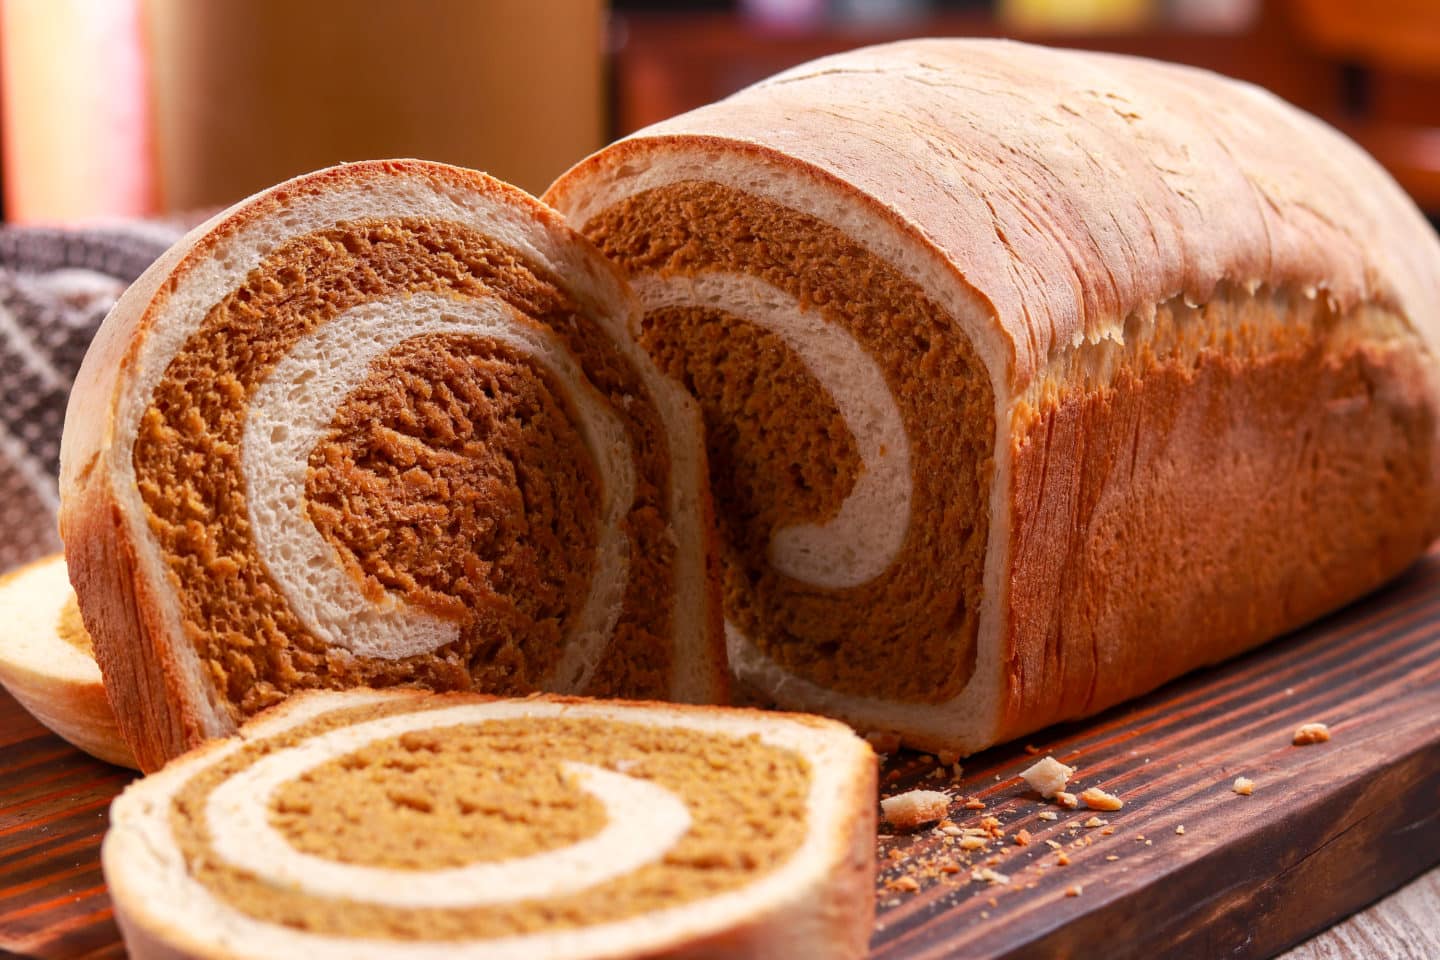
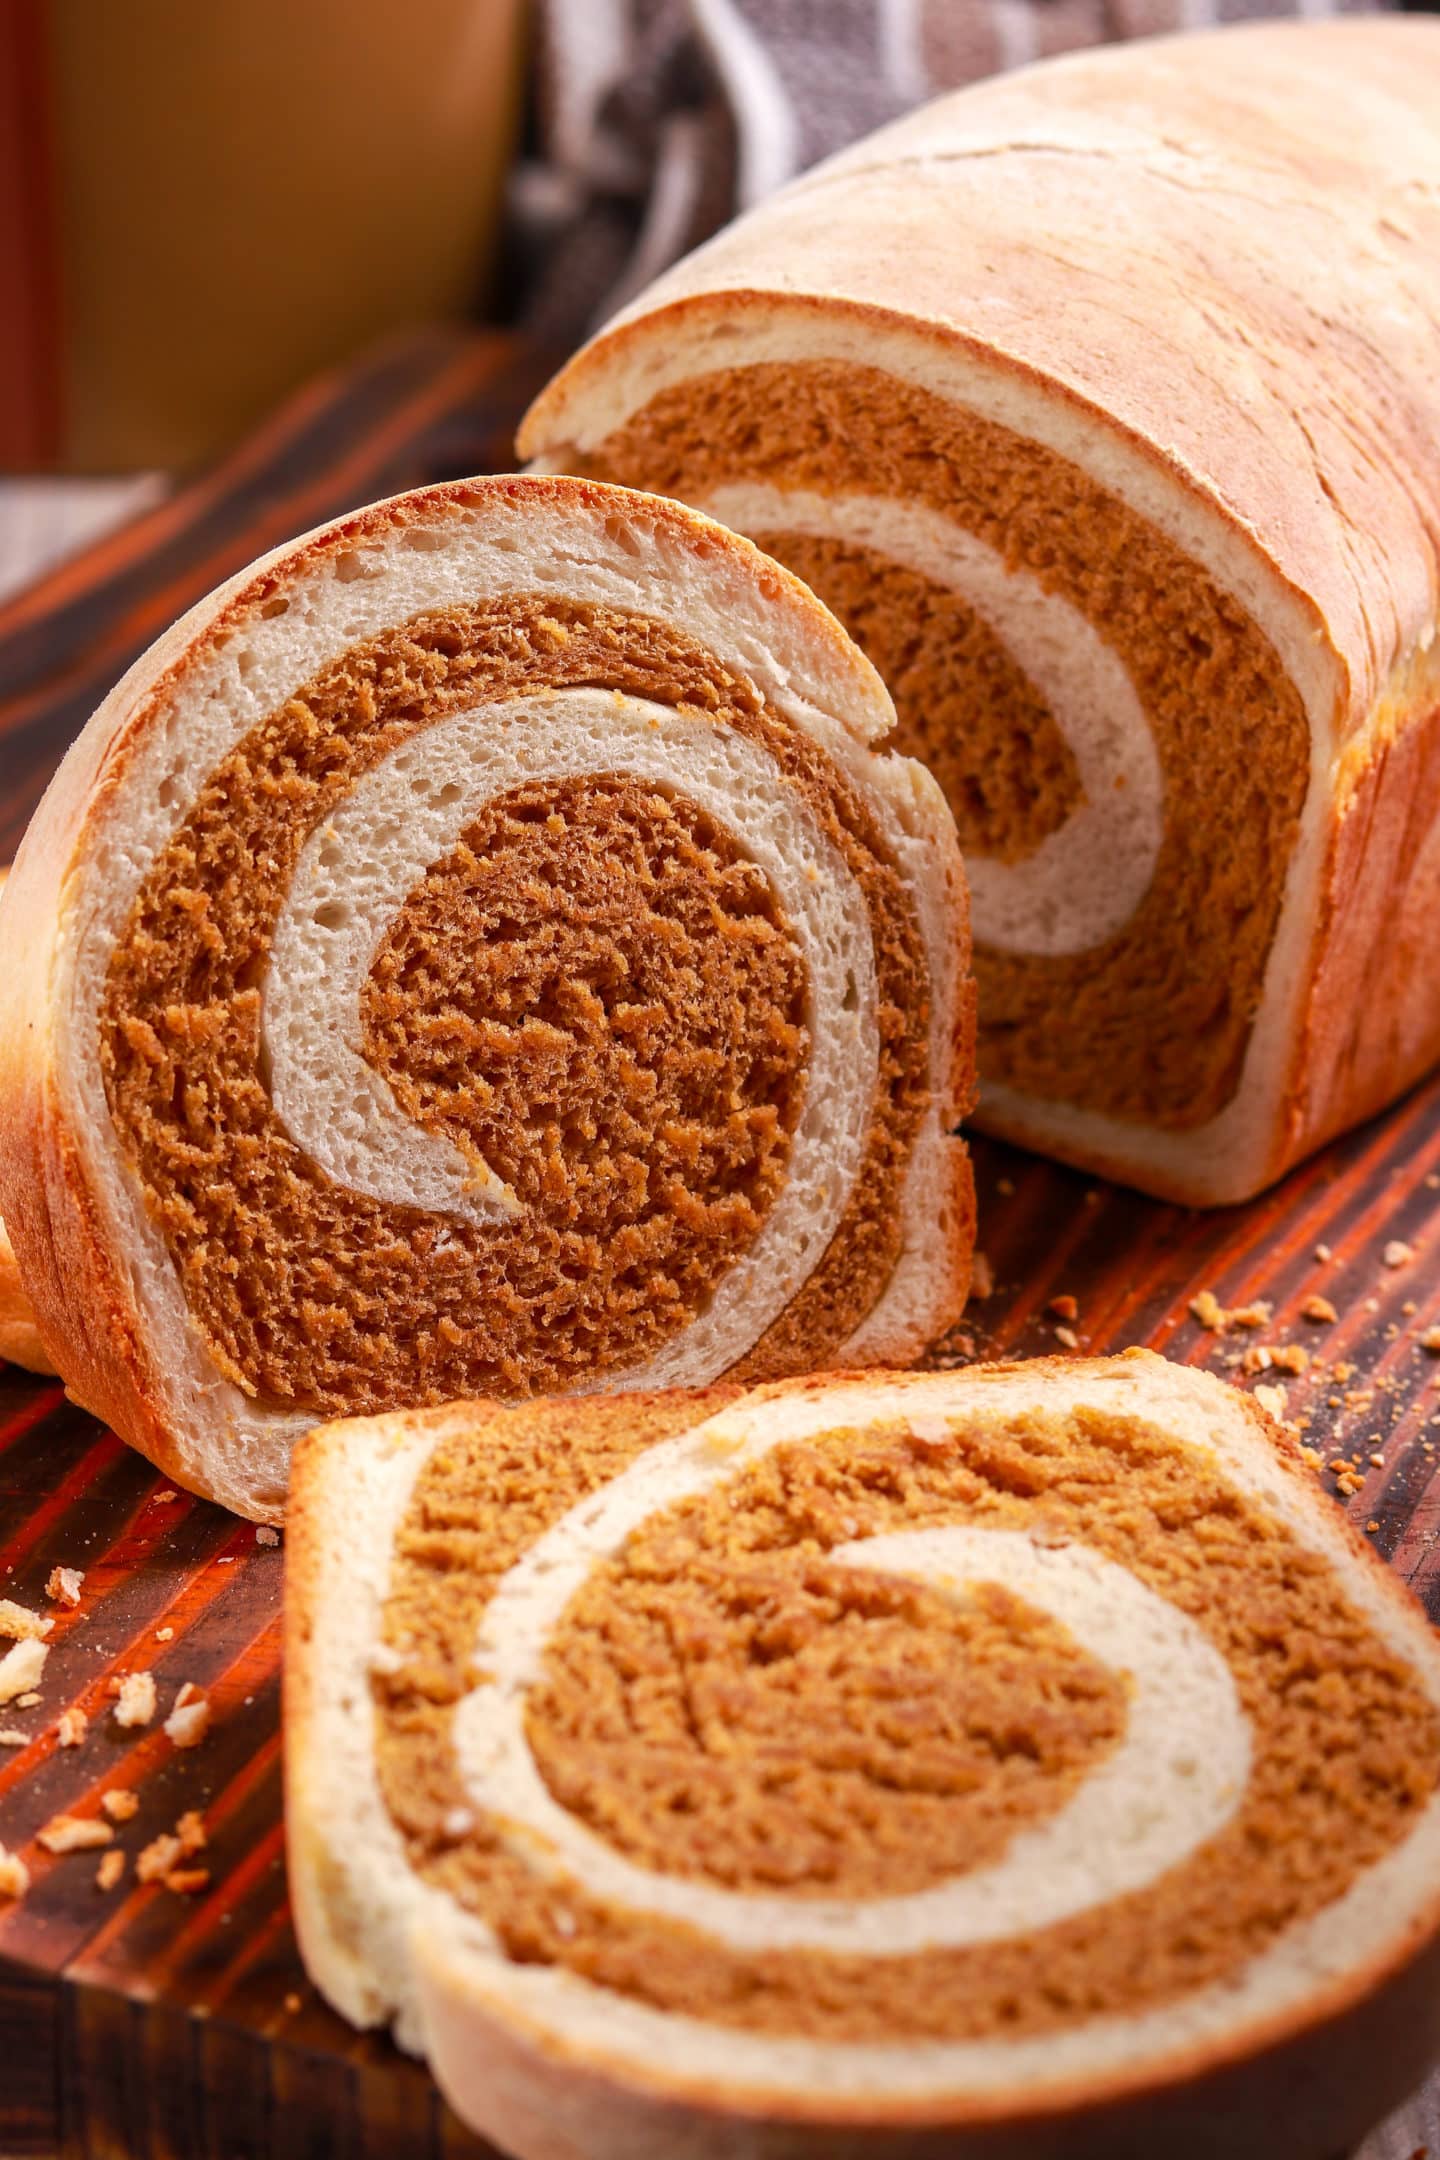
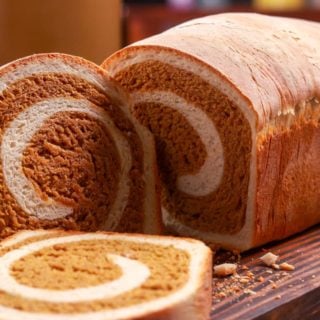
This bread is stunning and one of my favorites. I adore adore adore the flavor and the way it spirals all pretty.
Bonus: it’s not nearly as difficult as it looks! Essentially, you are making 2 doughs and rolling them up together. Gosh is it gorgeous, isn’t it!
This Marble Loaf has a crusty exterior, a soft interior, a mild white bread swirl, and a full-bodied rye bread swirl. It truly is the best of bread! Perfect for Reubens, grilled cheese, and strawberry jam!
Marbled Rye Loaf
Print Recipe Pin RecipeIngredients
- 3 to 3 1/2 cups all-purpose flour
- ¼ oz (2 ¼ teaspoons) fresh active dry yeast
- 1 ½ cups milk
- 2 tablespoons sugar
- 2 tablespoons cooking oil
- 1 ½ teaspoons salt
- 2 tablespoons dark molasses
- 1 ¼ cups rye flour
Instructions
- 1- In large bowl, combine 2 cups of flour and the yeast. Warm the milk, sugar, oil, and salt just until warm (try 40 sec in the microwave first and then go from there).
- Add the milk mixture to the flour mixture and beat it with a mixer for 30 seconds on low stopping to scrape the bowl often. Beat on high for about 2-3 minutes.
- Divide the batter in half and stir in as much of 1 cup of all-purpose flour as you can to 1 half of the dough. Turn that half out on to a floured surface and knead in more all-purpose flour (you won't be using it all, no worries!) until you get a dough that is smooth and springy (about 6-8 min by hand but only a couple with a stand mixer). Form it into a bowl and put it into a greased bowl to rise (cover the bowl) in a warm location (a sunny window is great!),
- To the other half of the dough stir in the molasses, rye flour, stir in as much of the remaining all-purpose flour (probably about 1/2 cup) as you can. Turn it out to a floured surface, knead it just like the other half, and place it into a greased bowl. Let both portions rise in a warm place for about 1 to 1 ¼ hours or until the dough has doubled in size.
- PUnch the portions down after it has risen. Cover and let rest for about 10 minutes. (kids love helping punch down the dough!)
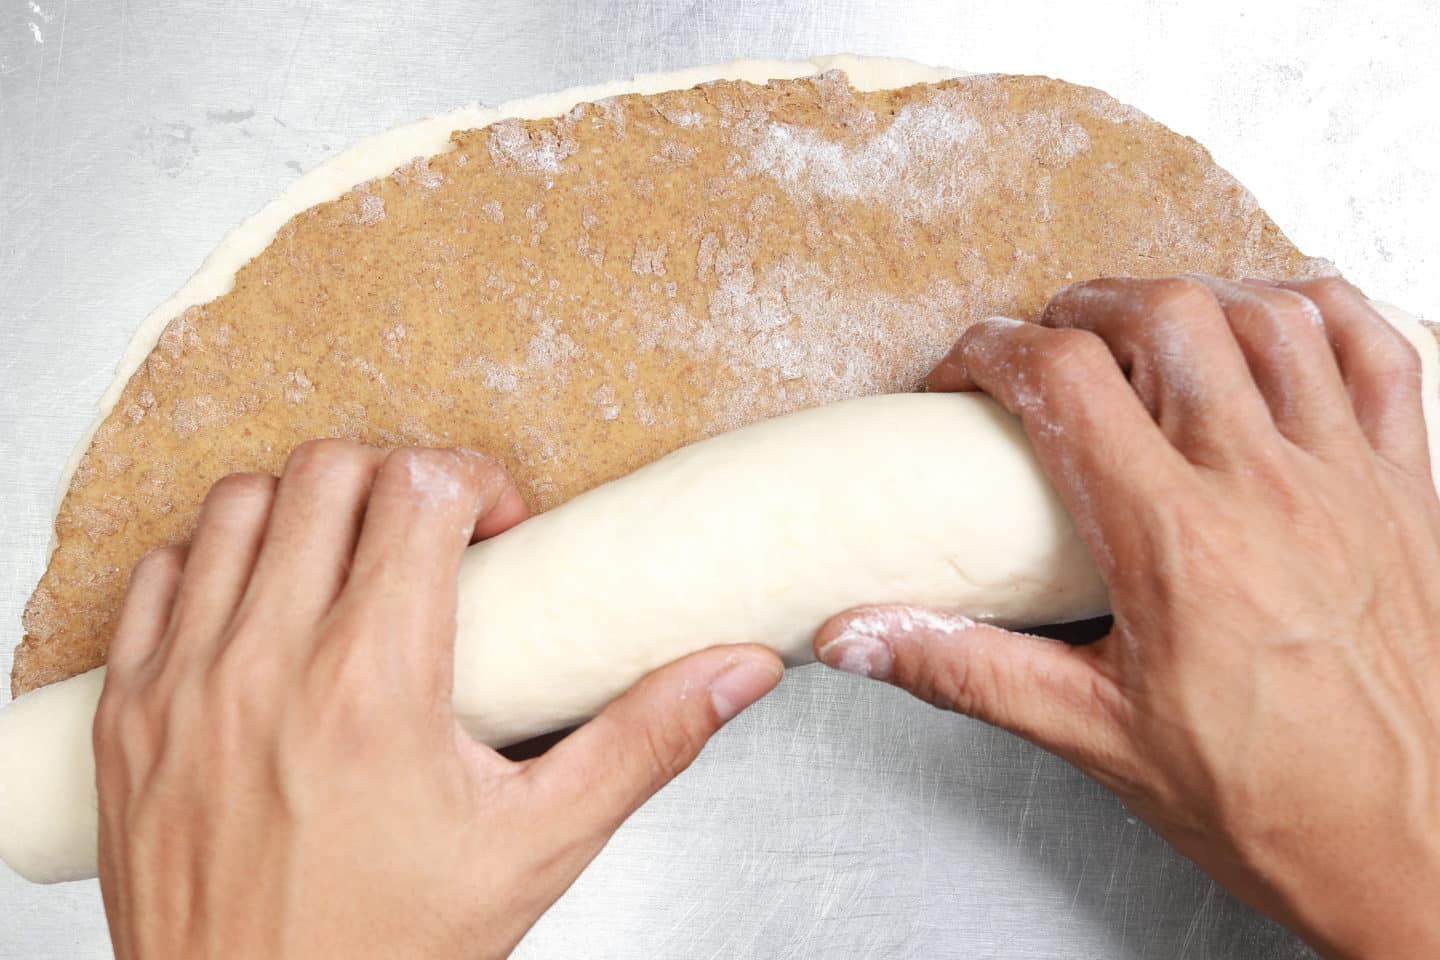
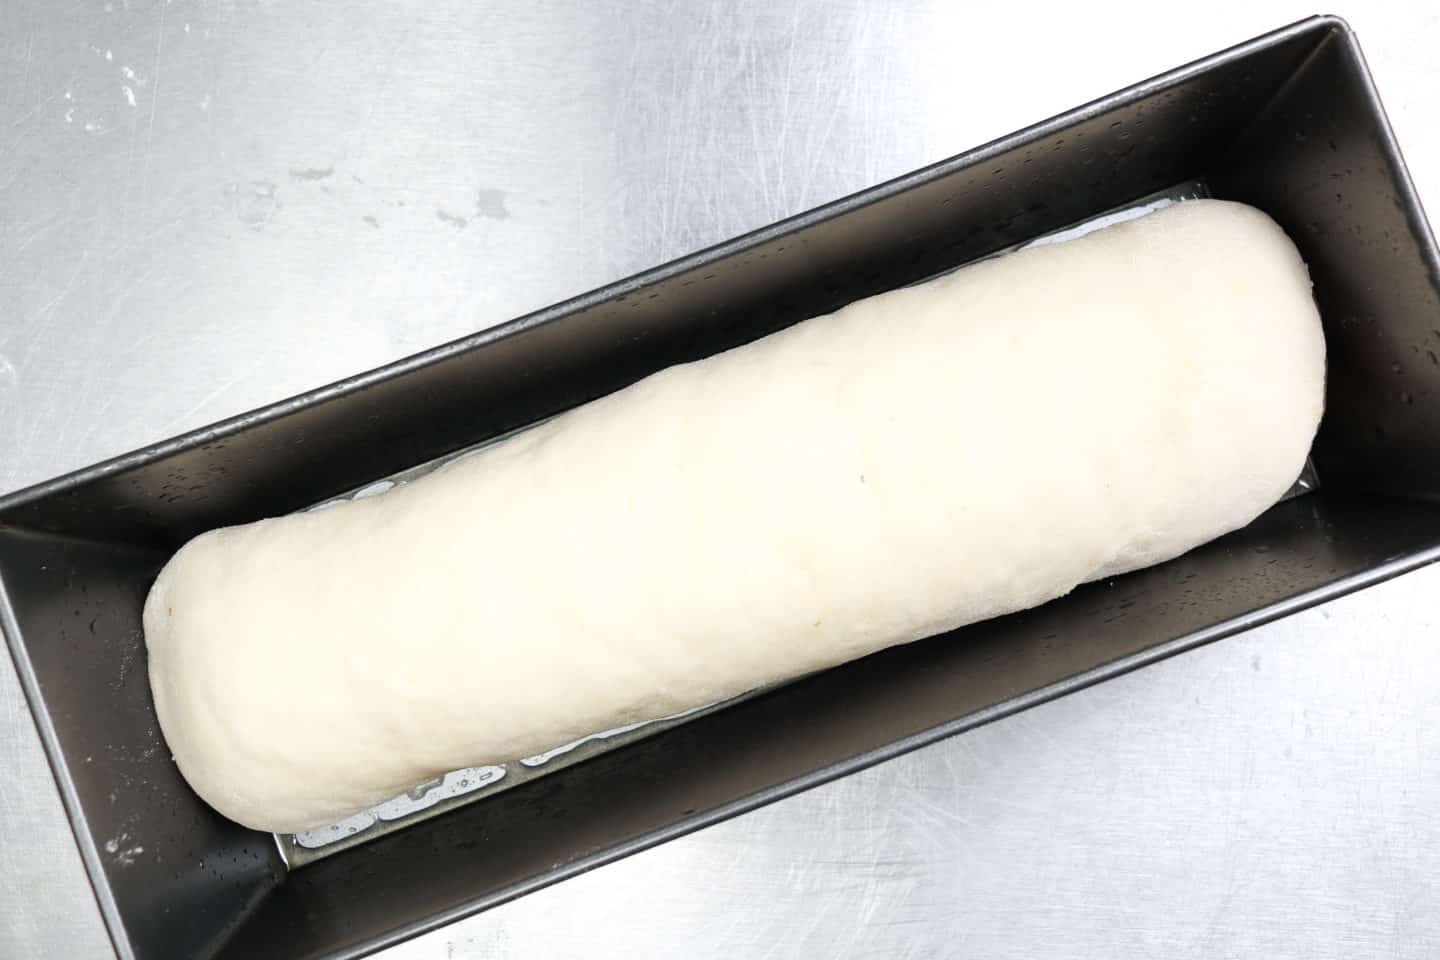
- On a lightly floured surface, roll out each half of the dough into a rectangle about 8 inch by 12 in size. Put the dark dough on top of the light and roll it up starting on the shortest side (you want your dough to be shorter rather than longer). Place it in a greased 8inch loaf pan (seam-side down). Cover and let rise until nearly double (20-30minutes)
- Bake in a 375 oven for 30-35 minutes. Trick: if you tap the bread and it sounds hollow, it is done. Let it cool for a couple beats and then immediately take it out. NOTE: some readers have needed to bake their bread for around 45 minutes. So give yourself plenty of time, if needed.
- Hint: if you think the bread needs more baking but it is already quite brown…cover the top with aluminum foil for additional baking without browning.
Notes
Other homemade breads to try:


This was a tough one for me! I have never made bread before. I had to throw out the first batch of rye dough and start over, but once I got going it was pretty easy. The only thing that didn’t go as directed was the cook time. I cooked it for 30 minutes, tapped it and had the hollow sound, cut into it and the center part was doughy. So I tossed it back in pan and did a few more minutes. Took it out and had the same problem. It took about 7 more minutes before it was done. Hopefully the cutting and then putting back in didn’t dry it out!